> ## Documentation Index
> Fetch the complete documentation index at: https://docs.cantina.xyz/llms.txt
> Use this file to discover all available pages before exploring further.
# Okta Configuration
> Learn how to configure Okta SSO for your Cantina organization
Cantina integrates directly with Okta for authentication. The setup process involves configuring an application in Okta's admin console and then connecting it through Cantina's SSO settings.
## Okta Settings
1. Navigate to the Okta Admin Console and select **Applications**.
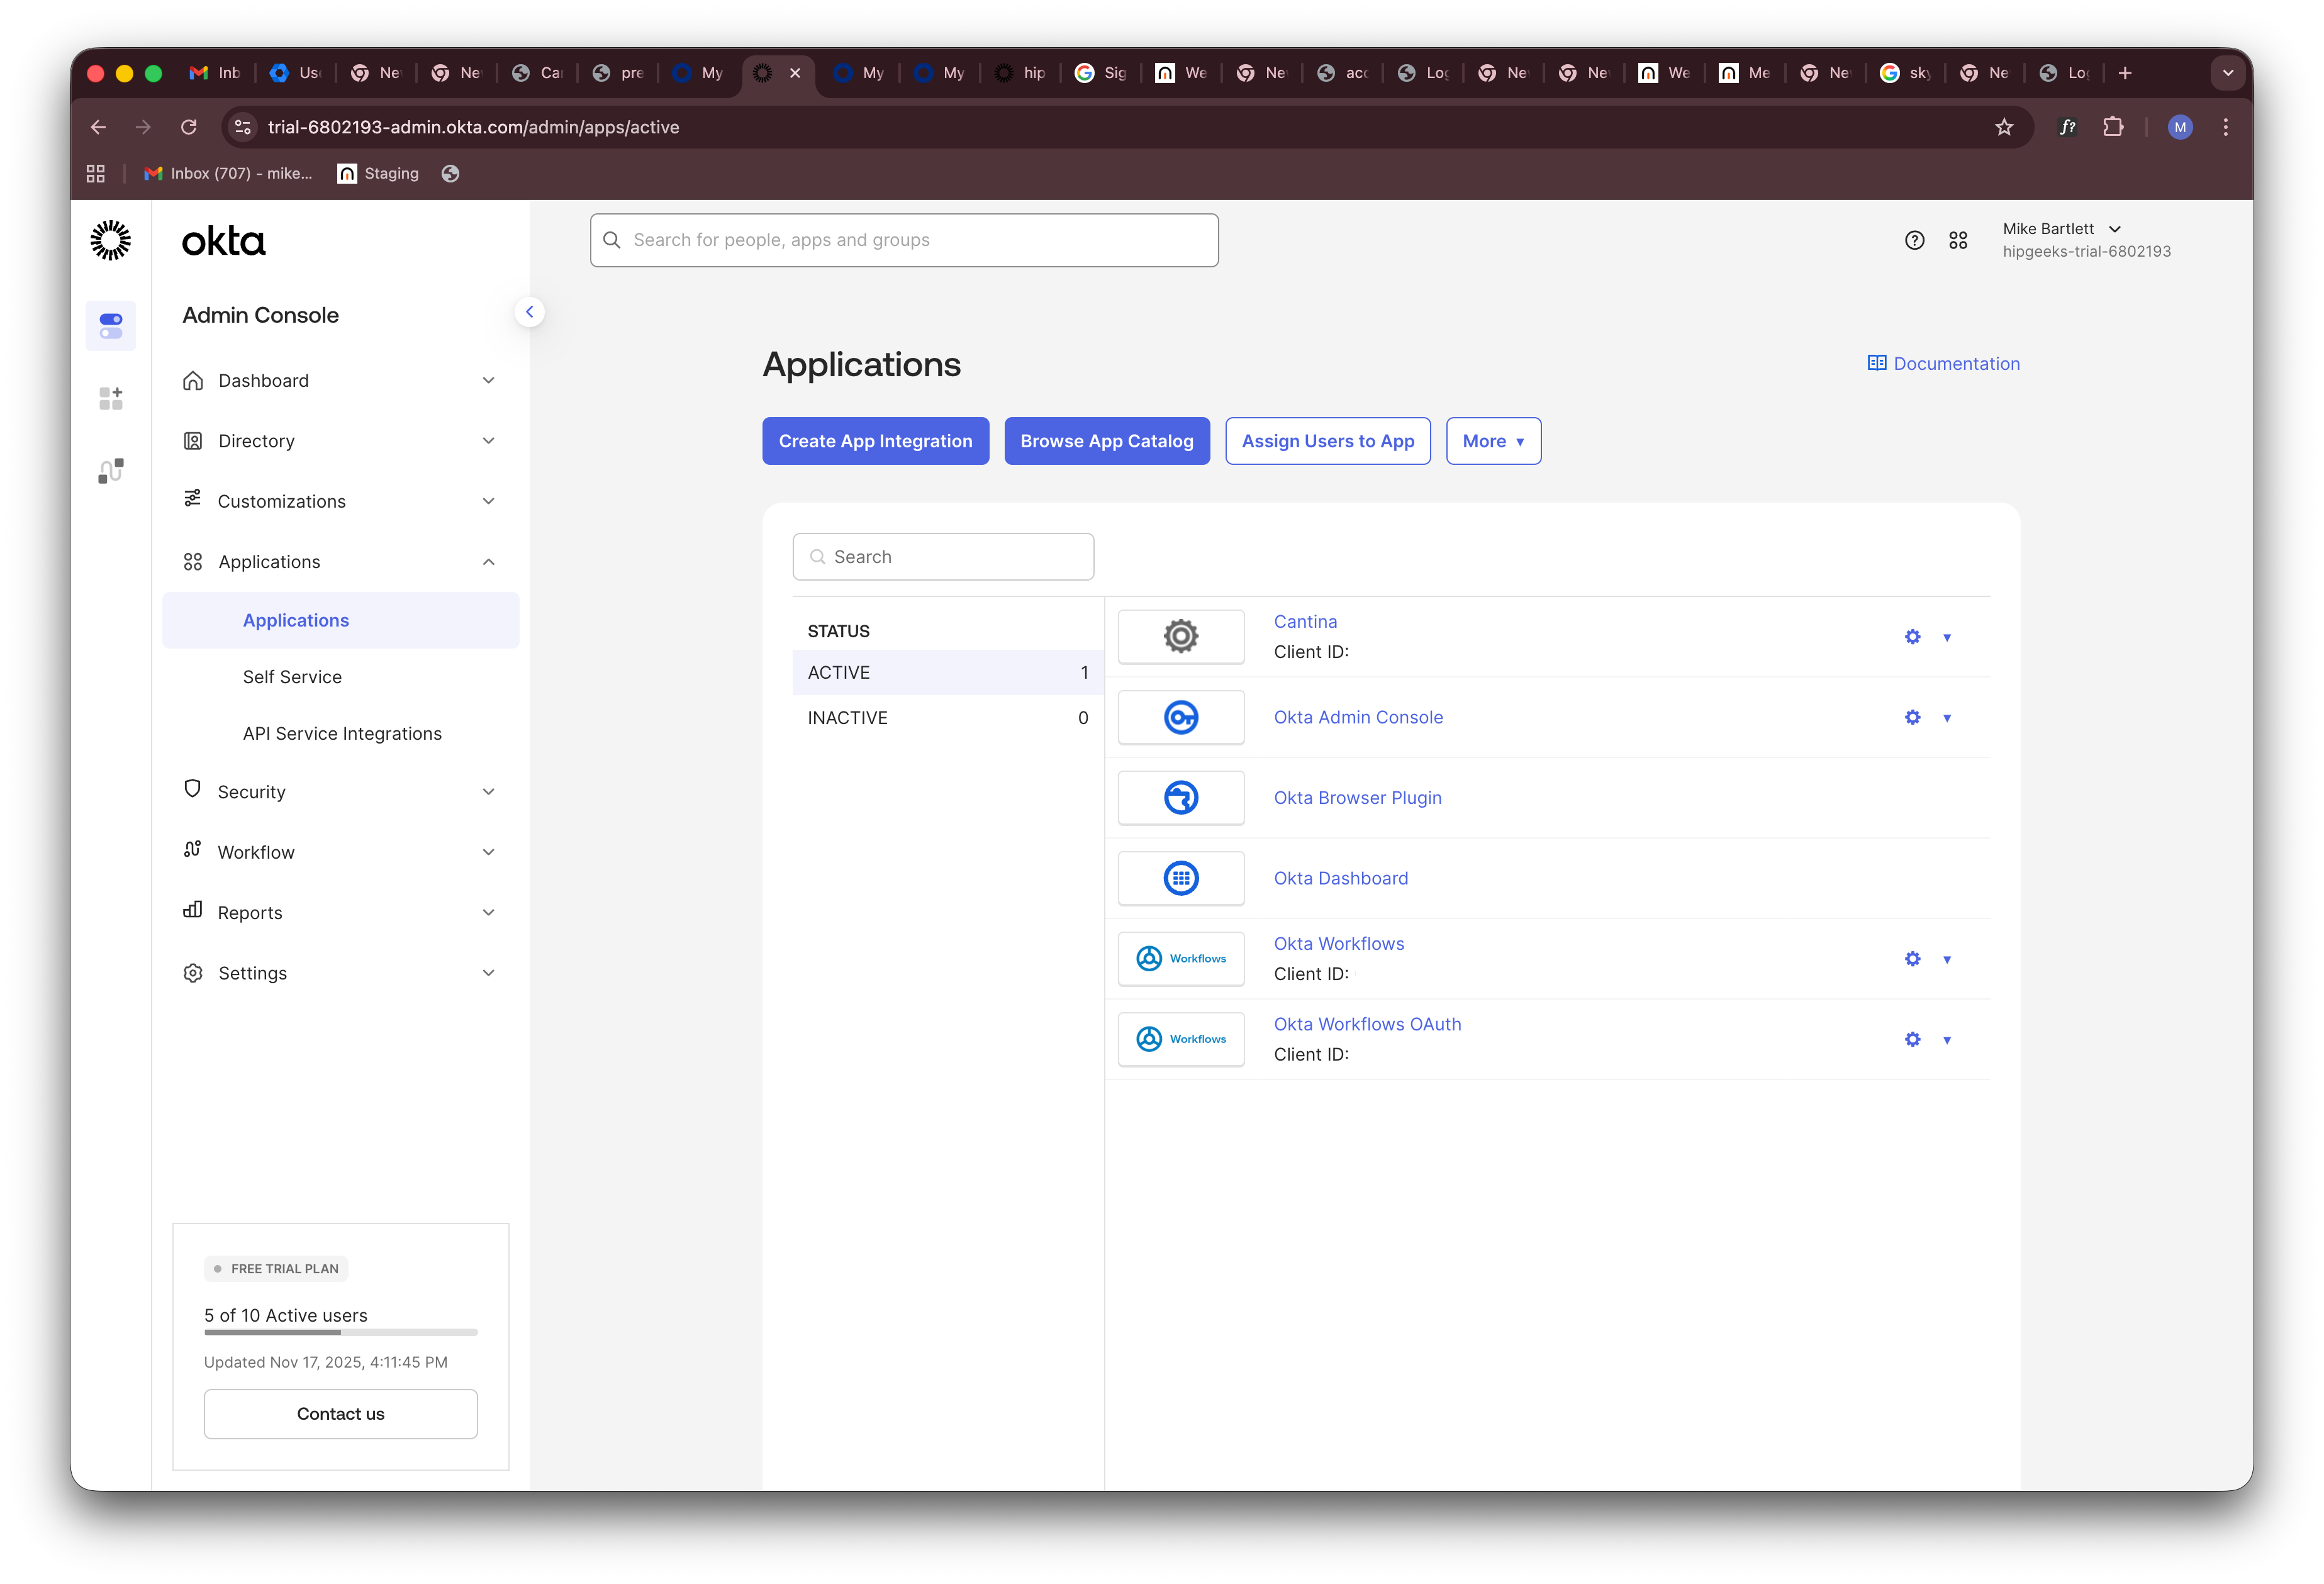 2. Click **Create App Integration** and select **OIDC - OpenID Connect**, then click **Next**.
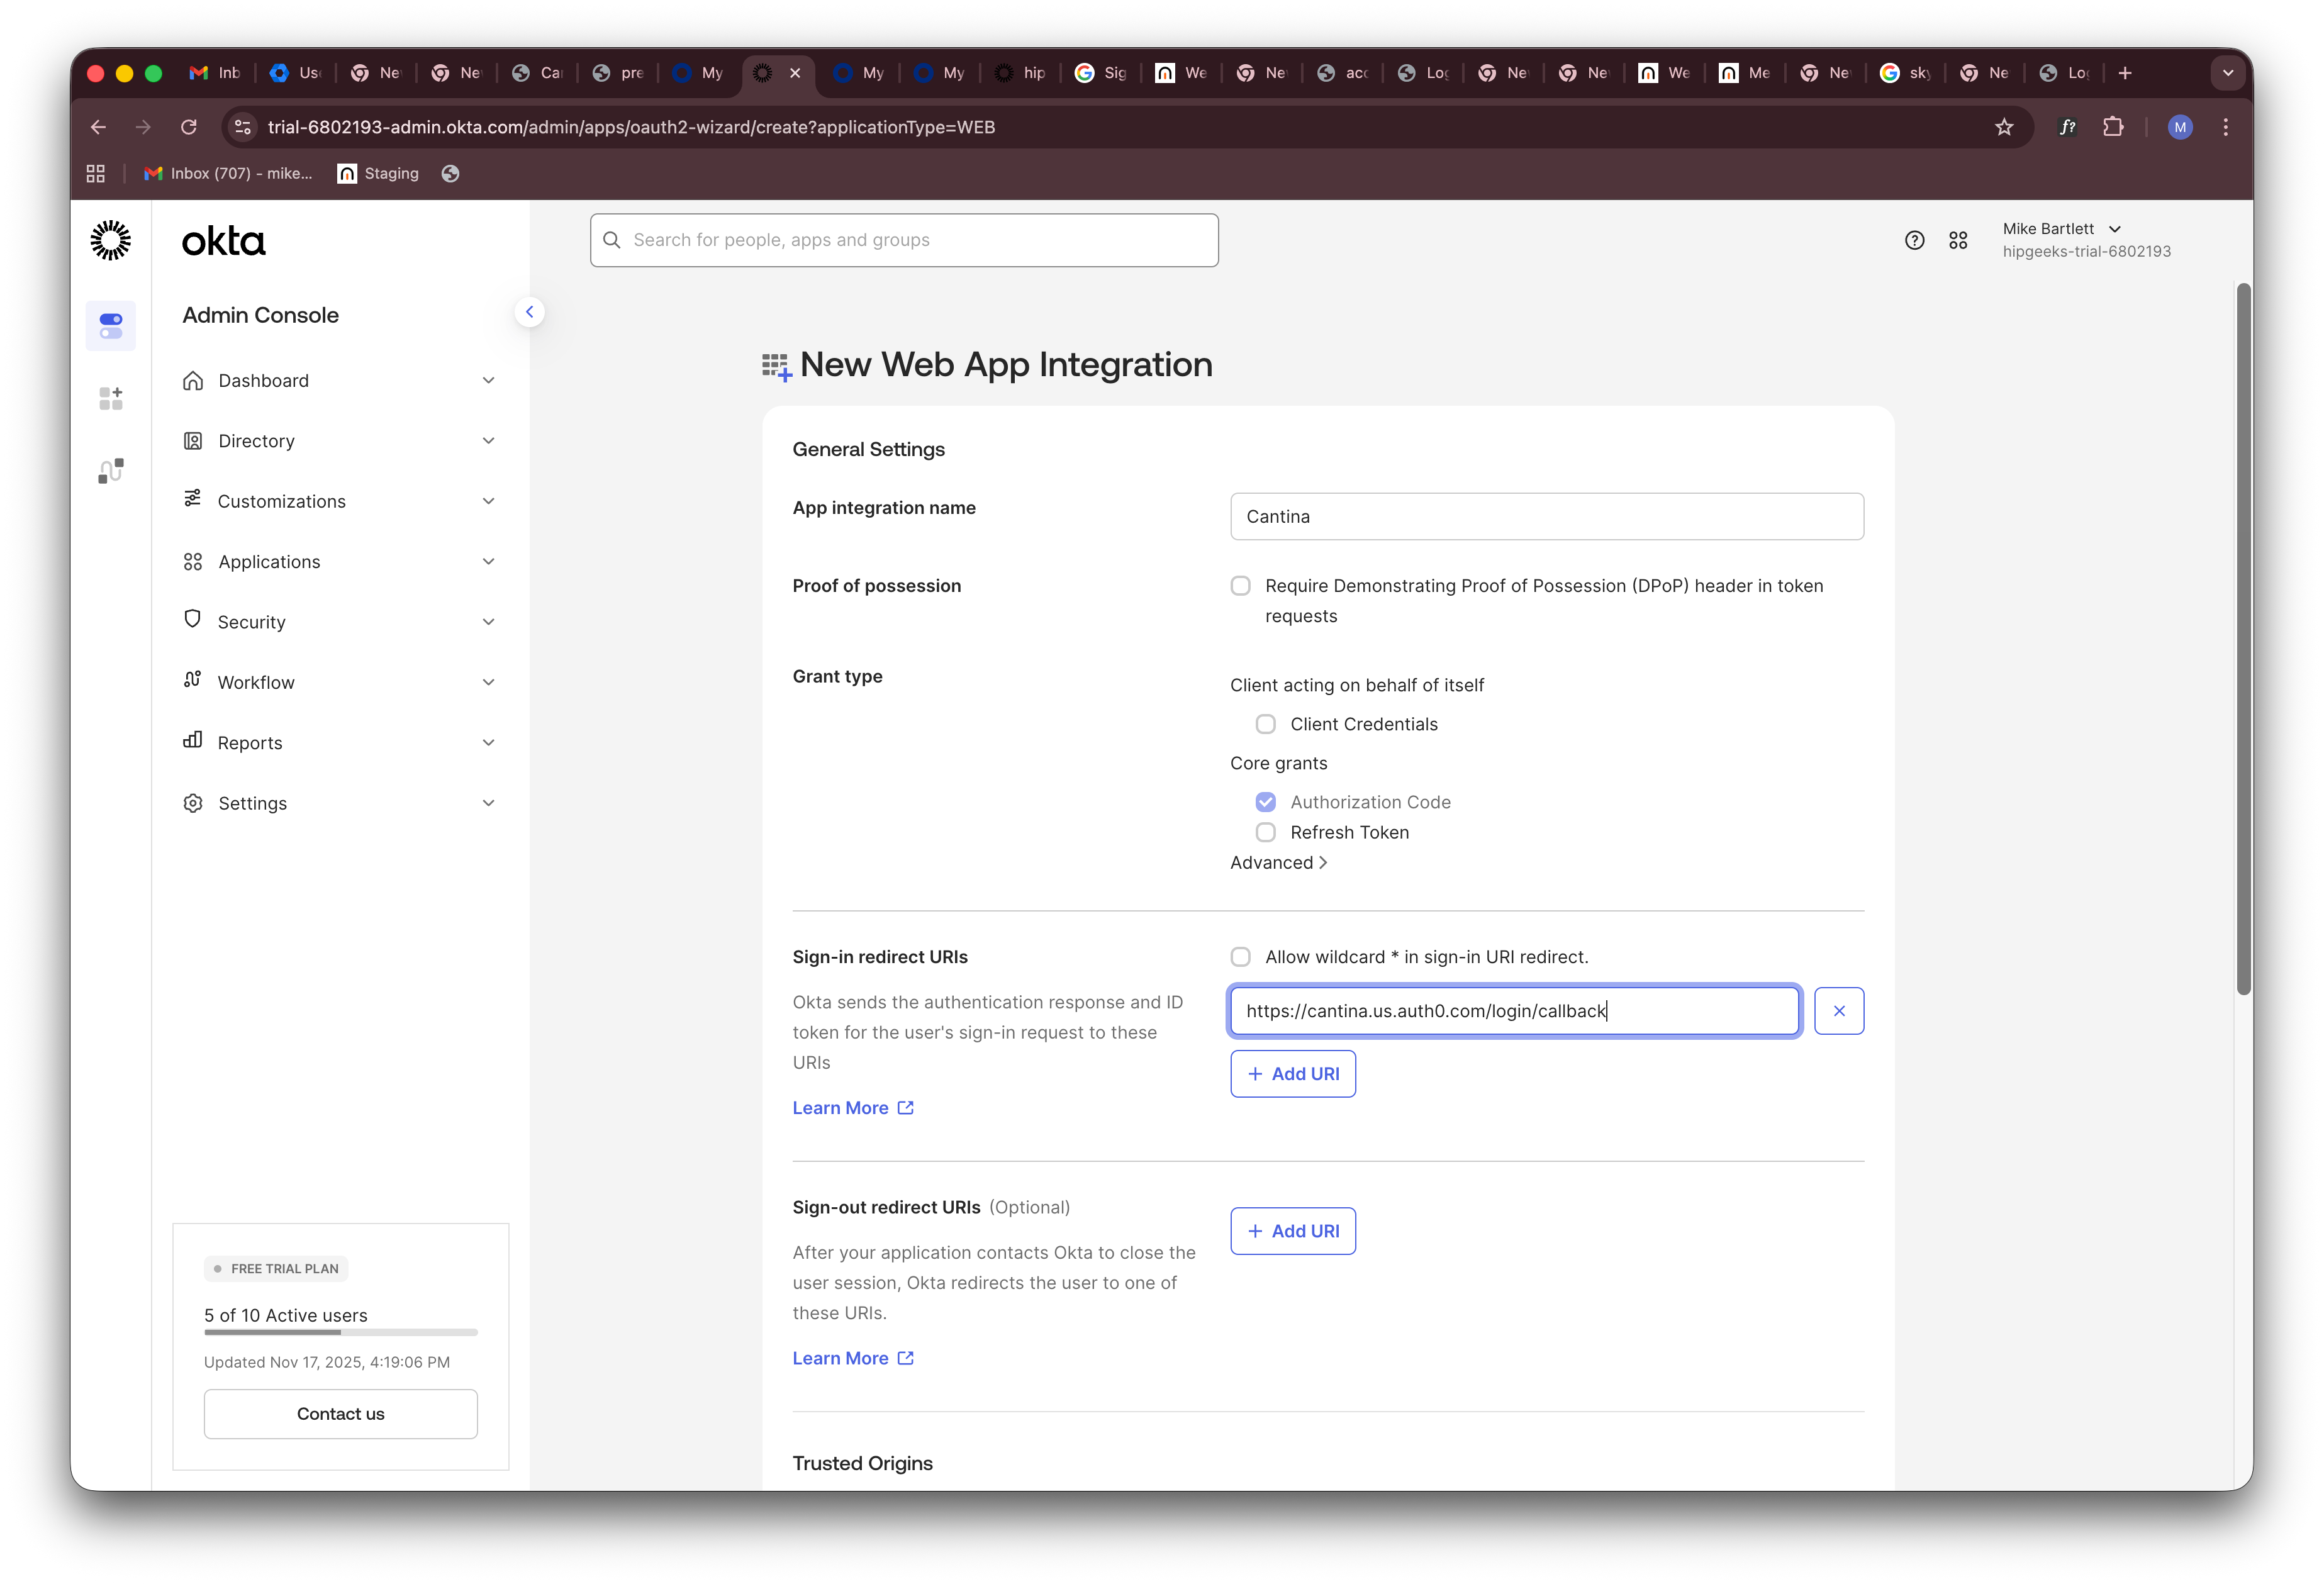
 3. Select **Web Application** as the application type.
 4. Configure your application:
* Name your application (e.g., "Cantina")
* Set the **Sign-in redirect URI** to: `https://cantina-prod.us.auth0.com/login/callback`
4. Configure your application:
* Name your application (e.g., "Cantina")
* Set the **Sign-in redirect URI** to: `https://cantina-prod.us.auth0.com/login/callback`
 ## Cantina Settings
1. Go to your organization's SSO settings at [https://cantina.xyz/organization/settings/sso](https://cantina.xyz/organization/settings/sso)
2. Click **Add SSO Connection**
## Cantina Settings
1. Go to your organization's SSO settings at [https://cantina.xyz/organization/settings/sso](https://cantina.xyz/organization/settings/sso)
2. Click **Add SSO Connection**
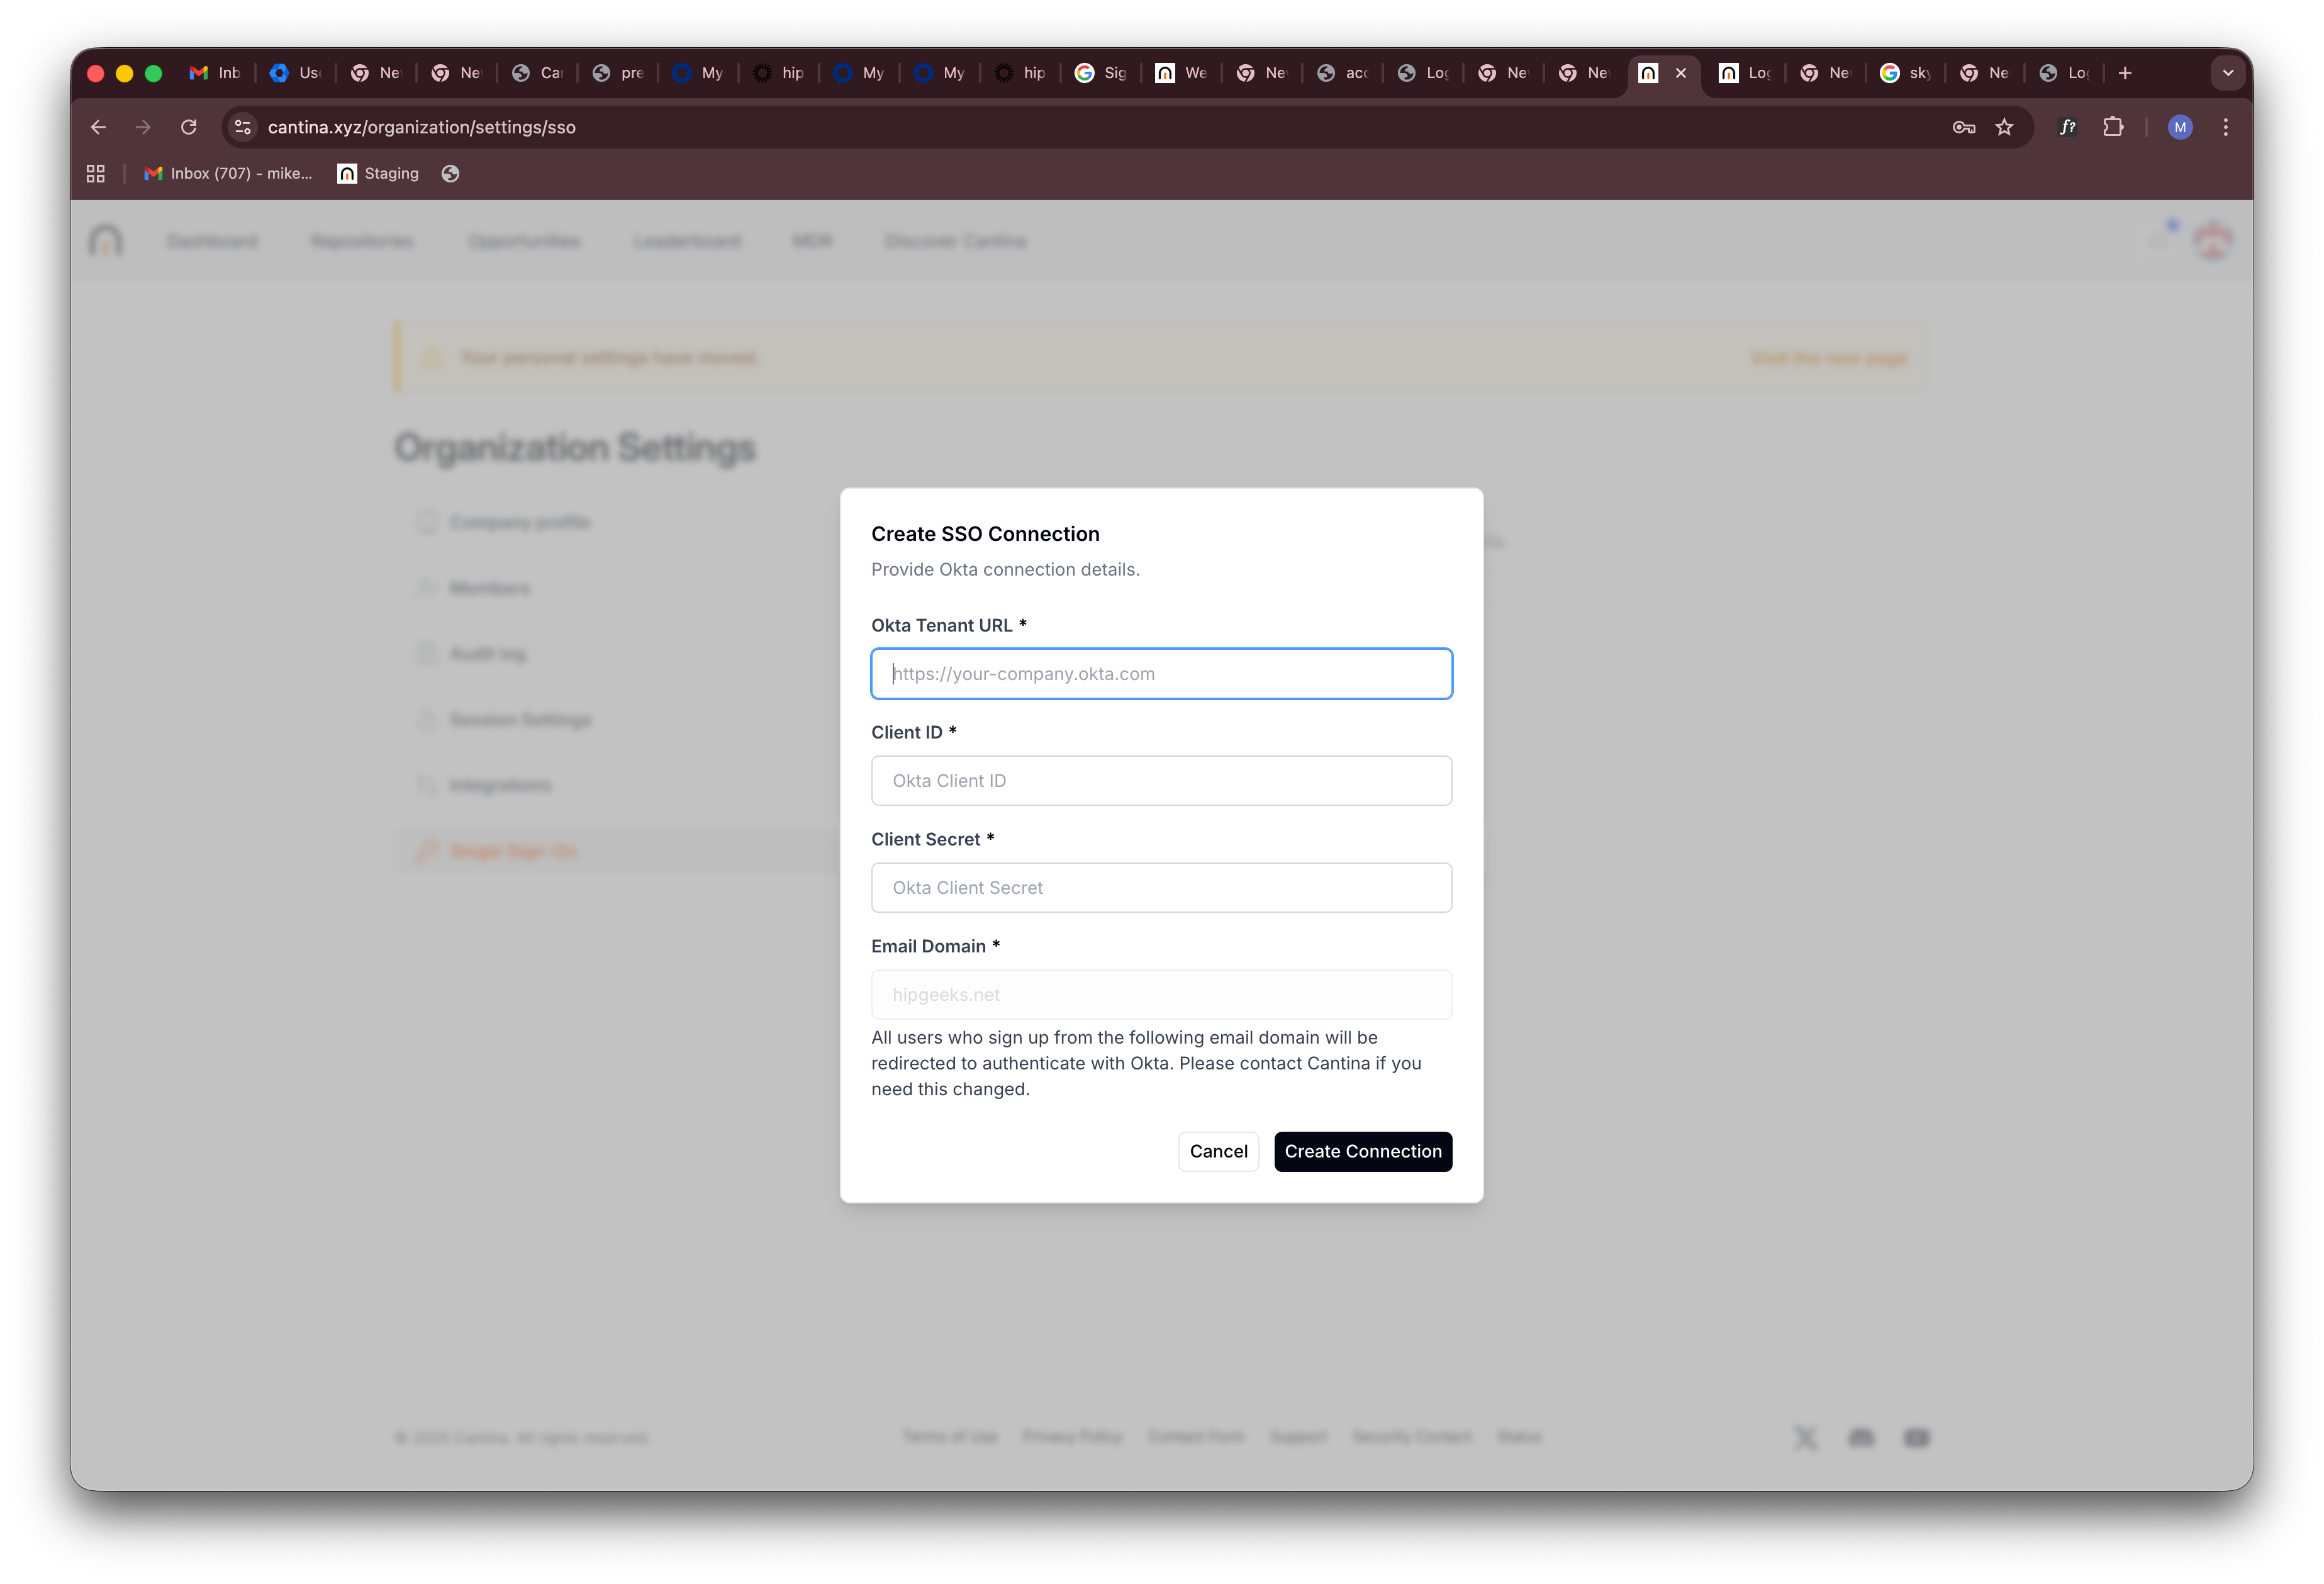 3. Enter the following information from your Okta application:
| Field | Description |
| ------------------- | ------------------------------------------------------------------------------------------- |
| **Okta Tenant URL** | Your Okta domain URL. Remove "-admin" from your admin panel URL if present. |
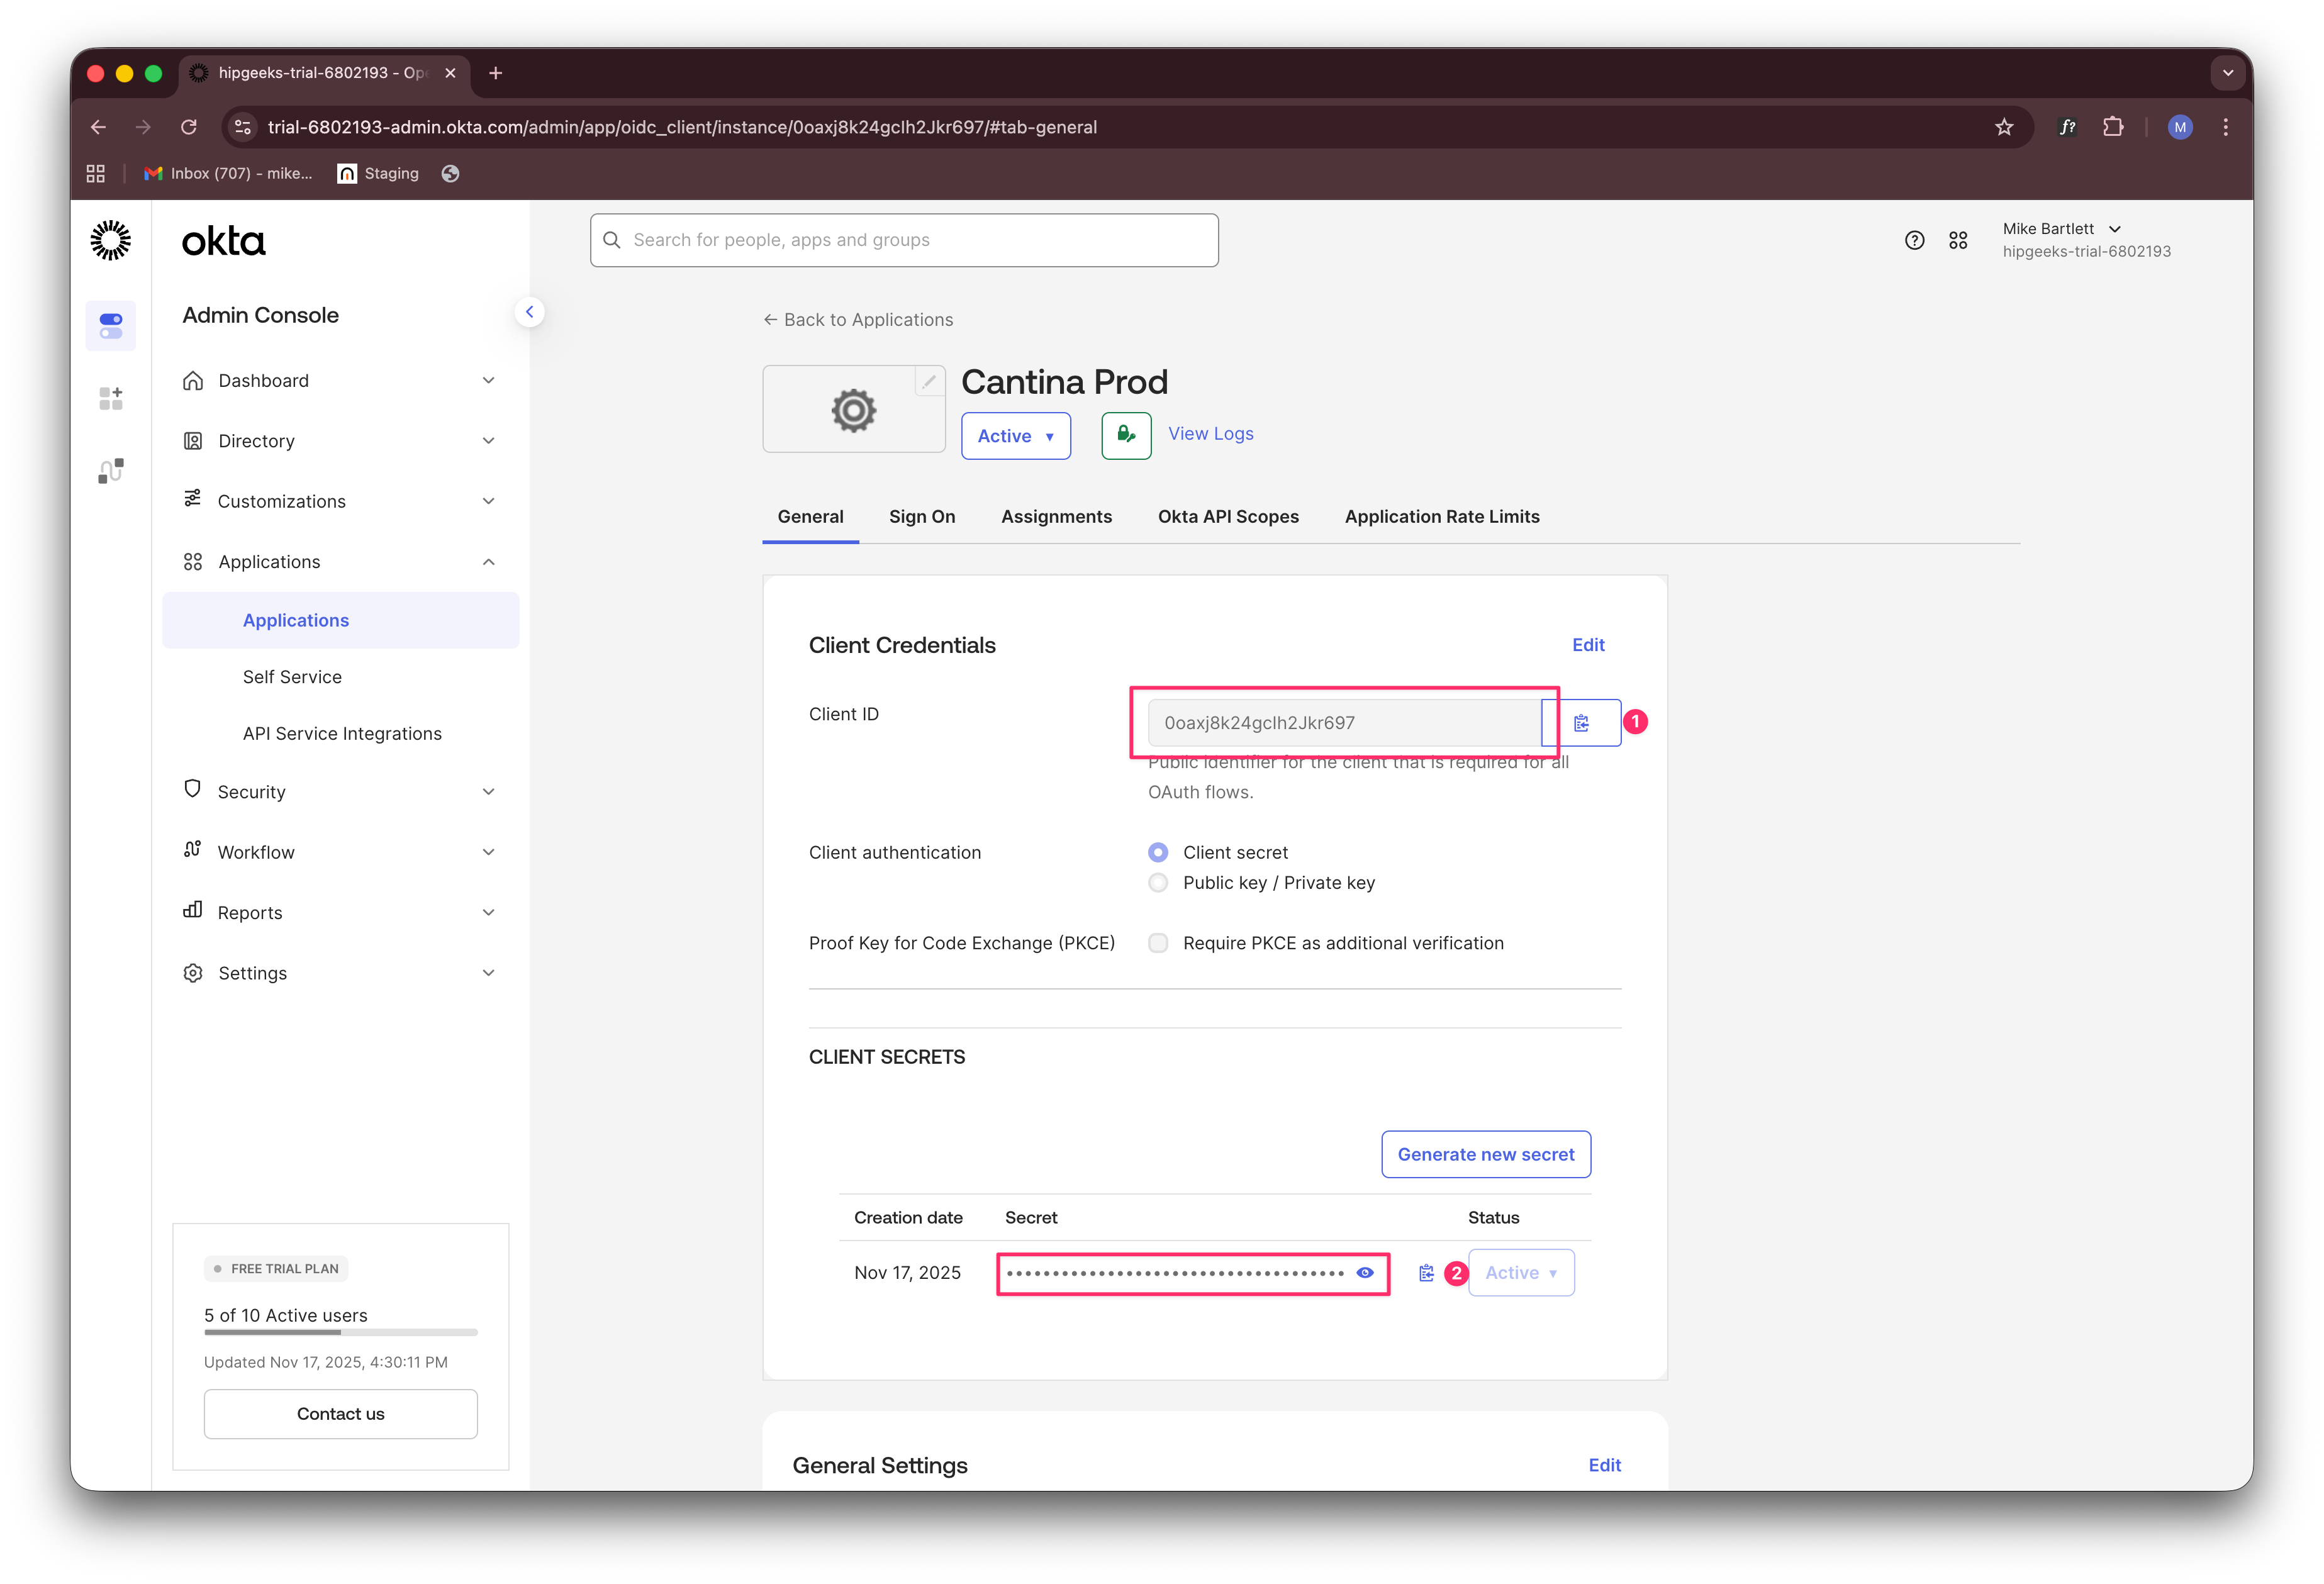
| **Client ID** | Found in your Okta application settings (see below). |
| **Client Secret** | Found in your Okta application settings (see below). |
| **Email Domain** | The email domain for your organization. Contact Cantina support if you need to modify this. |
3. Enter the following information from your Okta application:
| Field | Description |
| ------------------- | ------------------------------------------------------------------------------------------- |
| **Okta Tenant URL** | Your Okta domain URL. Remove "-admin" from your admin panel URL if present. |
| **Client ID** | Found in your Okta application settings (see below). |
| **Client Secret** | Found in your Okta application settings (see below). |
| **Email Domain** | The email domain for your organization. Contact Cantina support if you need to modify this. |

 All users with this email domain will be automatically redirected to Okta when they log in to Cantina.
## Testing
After configuration, log out of Cantina and attempt to sign in using your email address. You should be automatically redirected to Okta's authentication system.
All users with this email domain will be automatically redirected to Okta when they log in to Cantina.
## Testing
After configuration, log out of Cantina and attempt to sign in using your email address. You should be automatically redirected to Okta's authentication system.